

Well, if you are looking for how to add a custom font to Divi Theme Visual Builder, this blog post explains exactly how to go about it.
Step 1: Download The Custom Font to Your Computer
First of all, make sure that you have downloaded the custom font files to your computer. Ensure that the font files are either in the formats, ttf or otf – because these are the only files supported by the Divi Theme Visual Builder.
Here are the websites where you can easily find the custom fonts for your Divi website:
Step 2: Uploading The Custom Font
This should be the easiest step.
Go to any module that has text. Open its settings, then go to Design tab>>Font option, then click on Upload so you can be able to select the custom font from your computer.
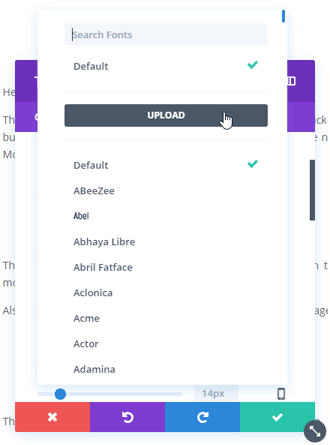
After you’ve uploaded the custom font, you can always select it whenever you are customizing texts on your Divi Website, or even make it your website’s default font.
I hope you will find this short tutorial useful.


0 Comments