
Divi Child Themes and Layouts on SALE!! Shop Now →.
Freelancer Blog Layout
Getting Started
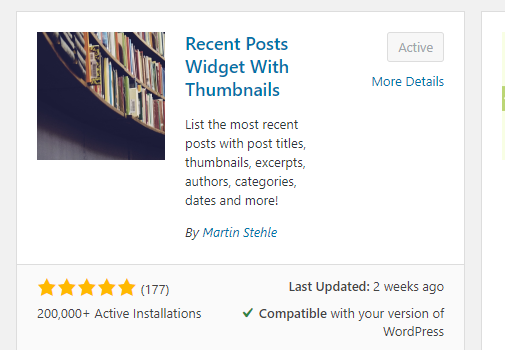
First, you will need to install and activate a WordPress Plugin called Recent Posts Widget With Thumbnails. Go to the admin dashboard, Plugins >> Add New then Search for the plugin.
Secondly, you will need to create new custom widget and name it widget1 (no spaces).
Navigate to Appearance >> Widgets, enter widget name then click create.
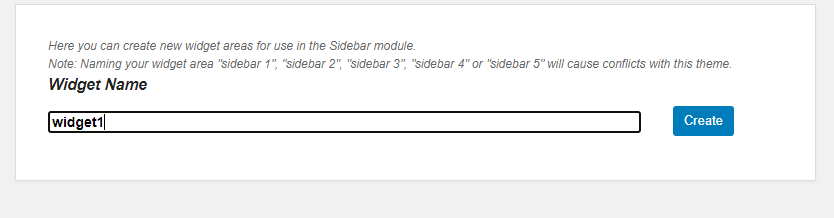
Reload the page to be able to see the newly created widget.
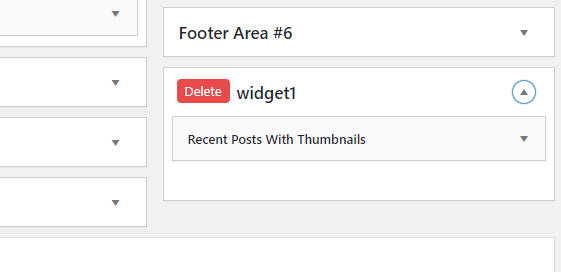
Populate widget1 area with Recent Posts With Thumbnails.
Importing Freelance Blog Layout
Once you have downloaded the Freelance Blog Layout zip file, unzip the file then locate the .JSON file named Freelancer Blog Layout.json. This file can be imported onto a new page. Imported layouts will replace your current page content with the exported content.
To import a Divi Builder Layout, click the portability icon within the Divi Builder to launch the portability system. Navigate to the Import tab. Click the “Choose File” button and locate your previously-downloaded file and click the “Import Divi Builder Layouts button.”
Customizing The Layout
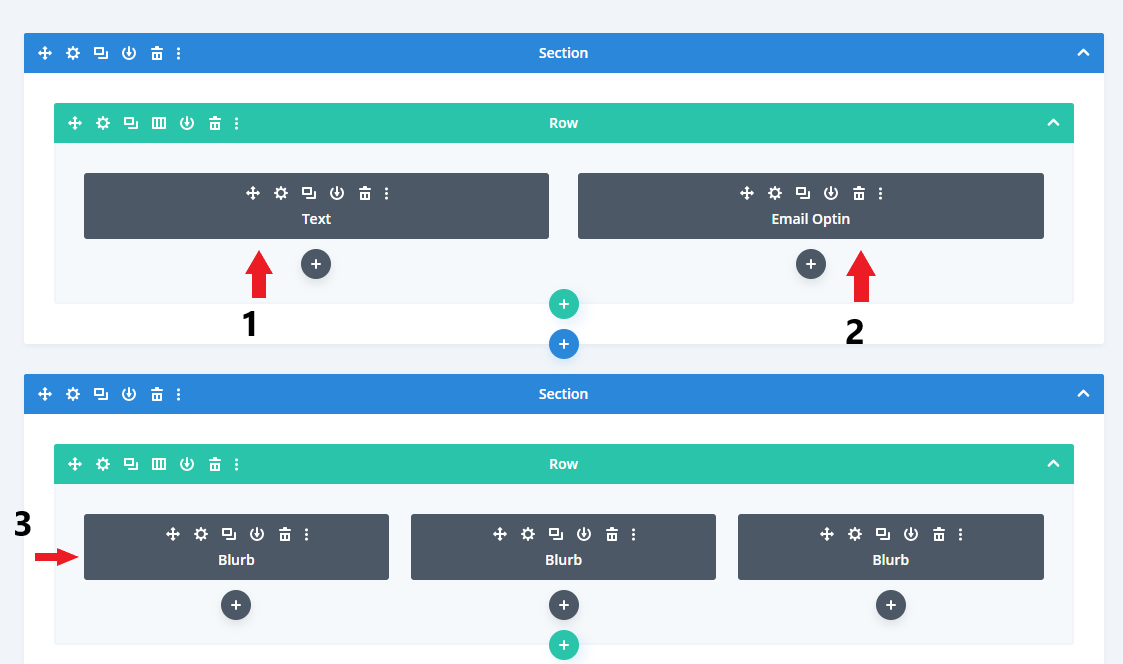
1. Text Module – Hero Text
You can change the text to anything you want.
2. Email Optin Module
To set up the email optin module, ensure that your preferred email marketing software is connected to your website.
3. Blurbs – Popular Blog Categories
Use this Section to showcase your top/popular blog categories.
The three modules are blurbs with images measuring 795px by 448px. Ensure that the images for the three blurb modules are of the same size.
When editing the texts inside the blurb modules, toggle the editor “Text” so you can be able to see where to place the category link.
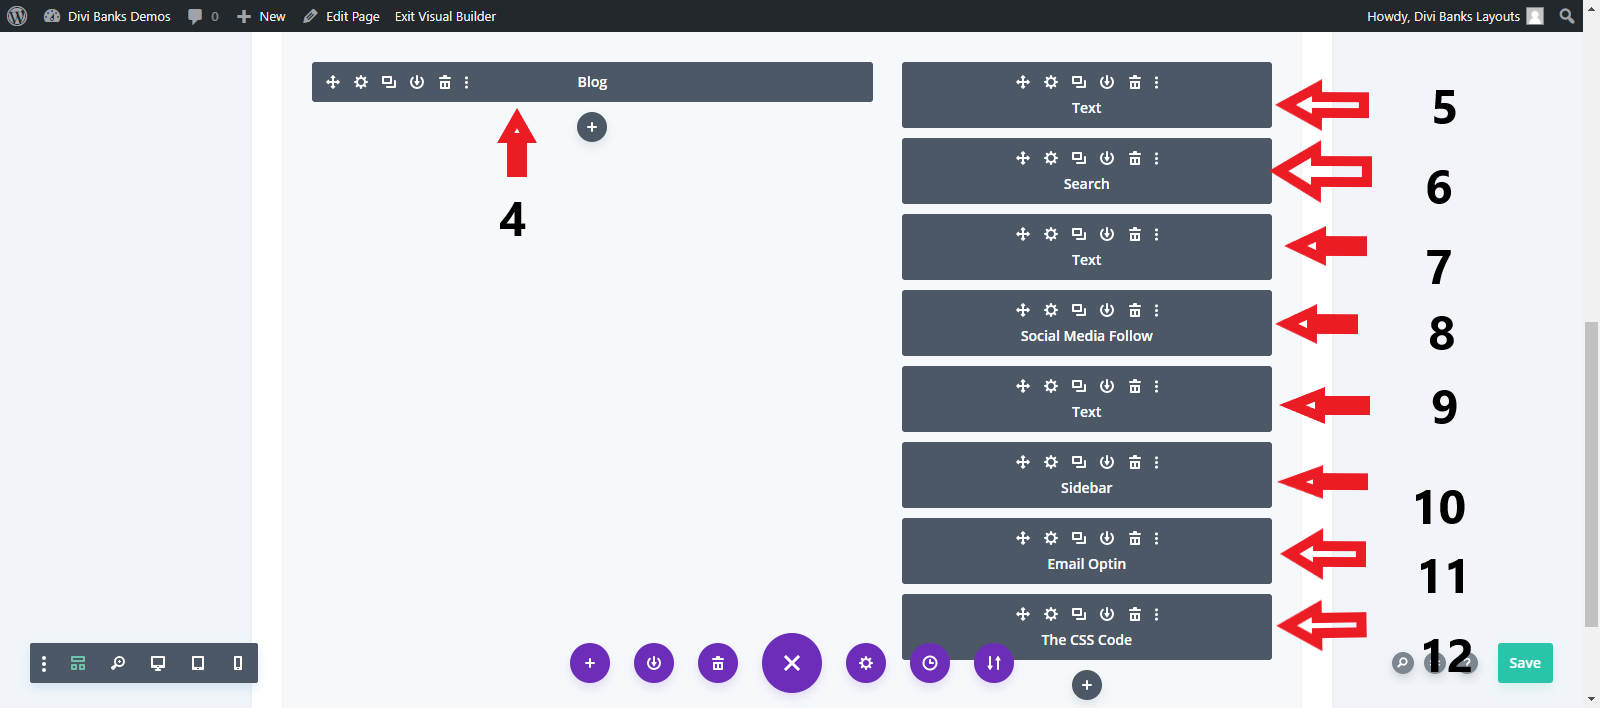
4. Blog Module
Here, you can adjust the number of posts to show on each page. On this layout, we are displaying six posts per page.
5. Text Module – Search This Blog
You can change the text to anything you want, and even play around with the text settings.
6. Search Module
You can change button design and everything else to match your blog.
7. Text Module – Title for social follow buttons
Change the text to match your audience size.
8. Social Media Follow Module
Add/remove some of the social media follow buttons.
Also, insert the appropriate links to each button.
9. Text Module – Recent Posts
10. Sidebar Module
On the Sidebar settings, choose “widget1” under the Widget area, then click Save Changes.
The widget1 is what we created at the beginning of this documentation. It will display recent posts with thumbnails, just like in our demo layout.
11. Email Optin Module
Should have the same settings as the module in #2.
You can choose to add an image, or do without an image.
Also, the email optin is sticky on scroll.
12. Code Module – The CSS Code
This code module contains all the CSS code used to customize this layout.
You can adjust the CSS code to your liking. For example, you can change the background color of the Read More button to a different one.
The CSS Code in this Code Module only applies in this particular layout. It won’t affect other pages of your website.
If you still need help importing and customizing this layout, do not hesitate to contact us.